Configuring Email Channels
Email channels deliver alert notifications through SMTP to a list of configured recipients. Managing Notification Channels describes the operations that every channel type shares, such as creating, testing, and enabling a channel.
Creating an Email Channel
Use the following steps to create an email channel in the Workbench:
- Open the
Administrationconsole, and selectEmail Channelsin theNOTIFICATIONSsection of the navigation pane. - Select
Add Channelto open theCreate email channeldialog. -
On the
SETTINGStab, enter a name for the channel and the SMTP connection details that Email Channel Settings describes.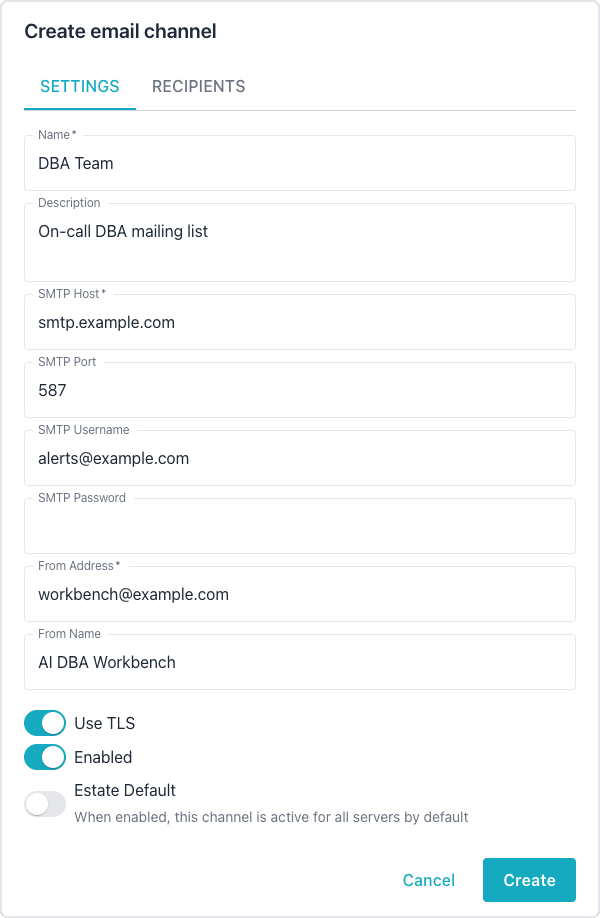
-
On the
RECIPIENTStab, enter each recipient's email address and display name, and selectAddfor each recipient.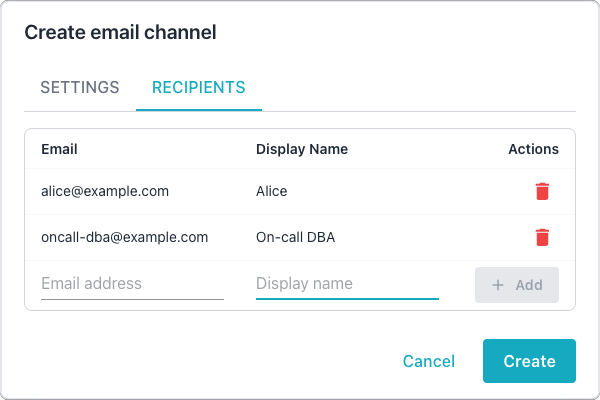
-
Select
Createto save the channel.
To change a channel later, select the edit icon in the channel's row on the
Email Channels page; the edit dialog has the same tabs.
Email Channel Settings
The following table describes the settings on the SETTINGS tab:
| Setting | Required | Default | Description |
|---|---|---|---|
| Name | Yes | - | A descriptive name for the channel. |
| Description | No | - | An optional description. |
| SMTP Host | Yes | - | The SMTP server hostname or IP address; an IPv6 address works with or without square brackets. |
| SMTP Port | No | 587 | The SMTP server port number. |
| SMTP Username | No | - | The username for SMTP authentication. |
| SMTP Password | No | - | The password for SMTP authentication. |
| From Address | Yes | - | The sender email address. |
| From Name | No | - | The sender display name. |
| Use TLS | No | On | Enables TLS encryption for the connection. |
| Enabled | No | On | Toggles the channel on or off. |
| Estate Default | No | Off | Makes the channel active for every server that has no override; see Estate Defaults. |
Managing Recipients
Each recipient on the RECIPIENTS tab has an email address, a display name,
and an enabled toggle. You can add recipients when you create the channel or
later through the edit dialog.