Connecting with pgAdmin
To manage your pgEdge Starfleet database and its objects with the pgAdmin
client, right-click the Servers node, then select Register, then
Server from the context menu.
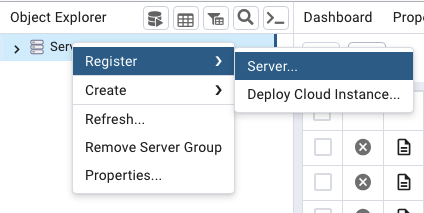
The Register - Server dialog opens:
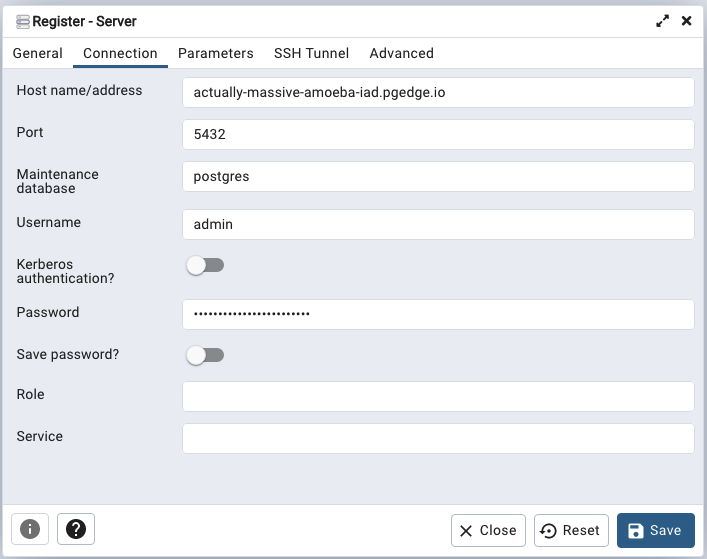
When prompted, provide authentication details on the pgAdmin Connection tab.
To find connection information for your database, highlight the database name
in the navigation panel, and review the Connect pane displayed on the
Database page; complete the Connection tab from those values:
Host name/addresstakes the value displayed in theDomainfield.Porttakes the port from theConnection string.Maintenance databasetakes the name of your database.Usernametakesappwhen connecting for the first time.Passwordtakes the password associated with the user.
The app user owns the database, so the tables and other objects it
creates belong to app. Use the admin user instead to install a
supported extension app cannot install, such as vector, or for the
server-wide work described in
Managing Database Roles.
pgAdmin can connect only from an address on the database allowlist. Check
that the ALLOWED IP RANGES list on the Connect pane has a range for the
address pgAdmin connects from. For more information, see
Controlling Network Access.
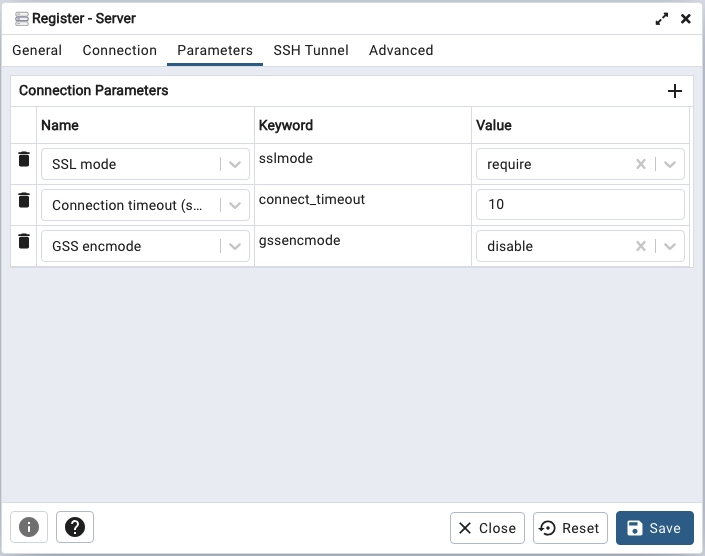
Set these values on the Parameters tab:
SSL modeisrequire, selected from the drop-down to its right.GSS encmodeisdisable, added as a new row: select the+at the top of the parameter table, chooseGSS encmodefrom theNamefield's drop-down list, and setValuetodisable.
Complete the other tabs in the Register - Server dialog, specifying your
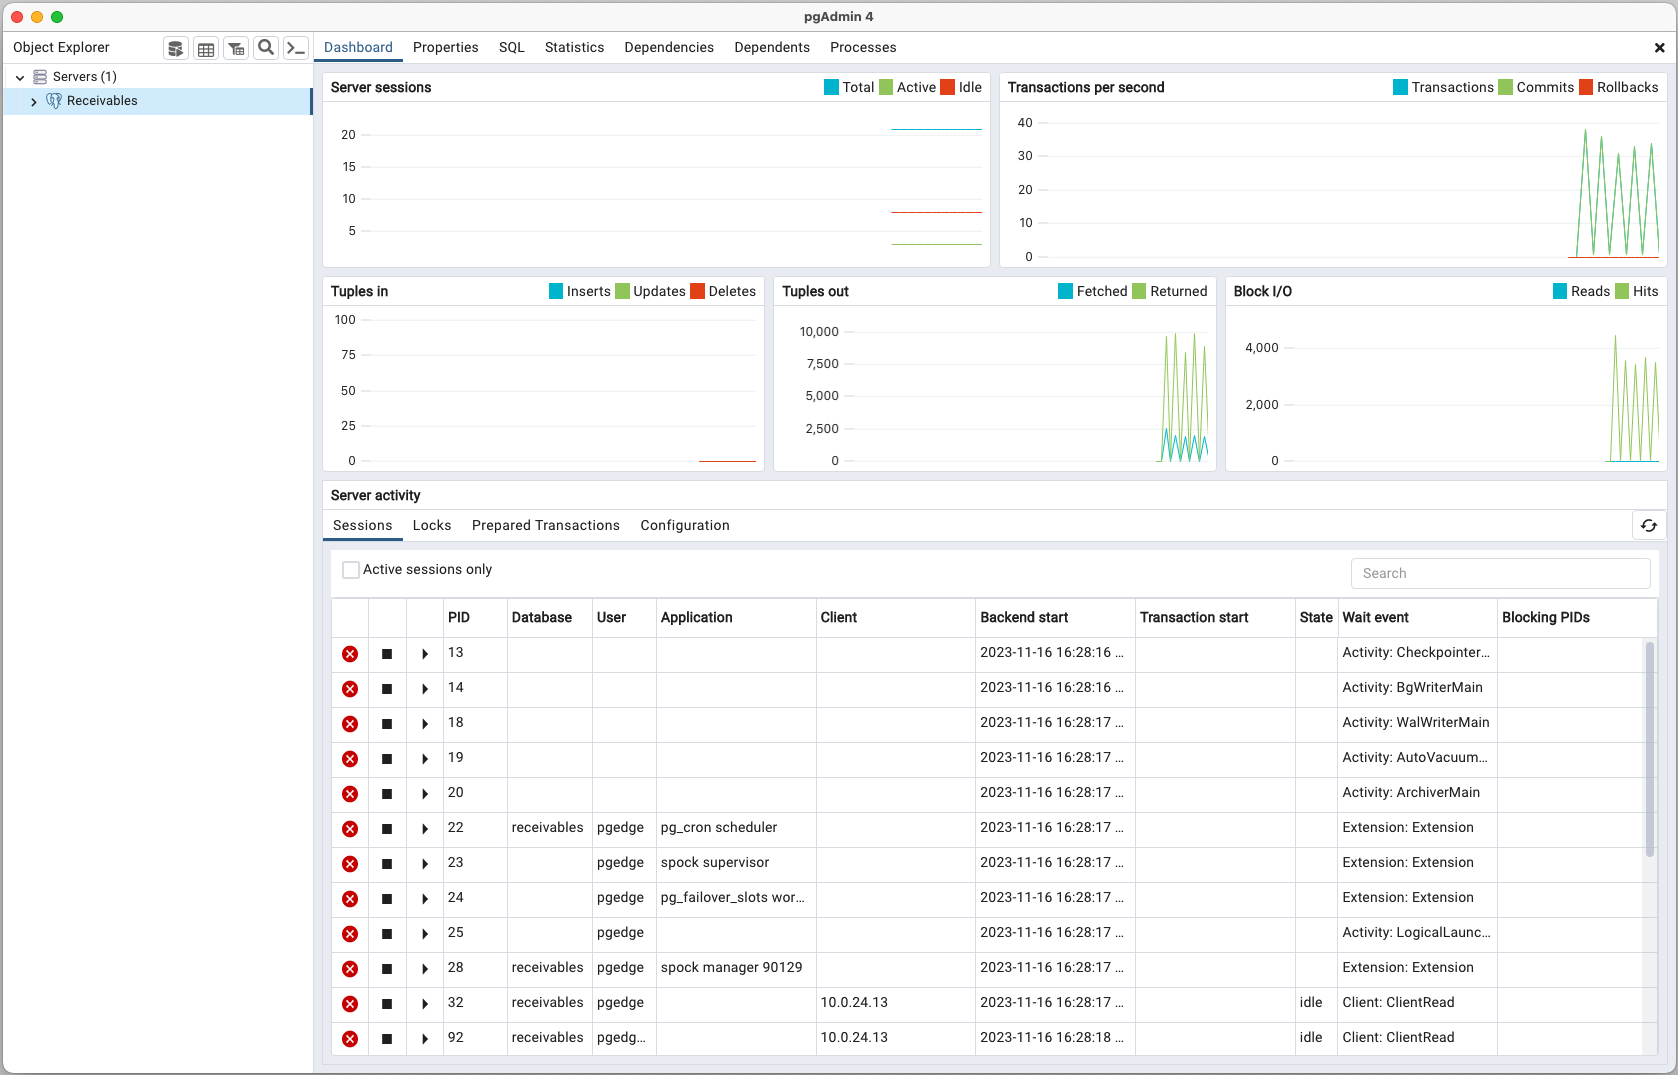
connection preferences, and select Save. The connection to your database is
added to the Servers node in the Object Explorer pane, and the pgAdmin
Dashboard displays current database activities.
For detailed information about using pgAdmin, see the pgAdmin documentation.