Linking an AWS Account
To link an AWS provider account with your pgEdge Starfleet BYOC account, select
the Cloud Accounts heading in the left navigation pane and then the
+ Link Cloud Account button. The Link Cloud Account popup opens:
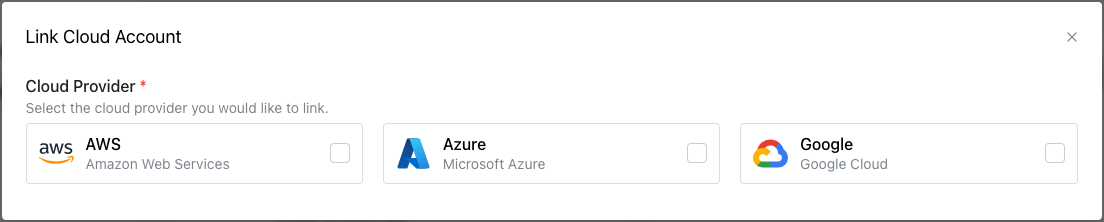
On the Link Cloud Account popup, select the AWS icon to expand the dialog.
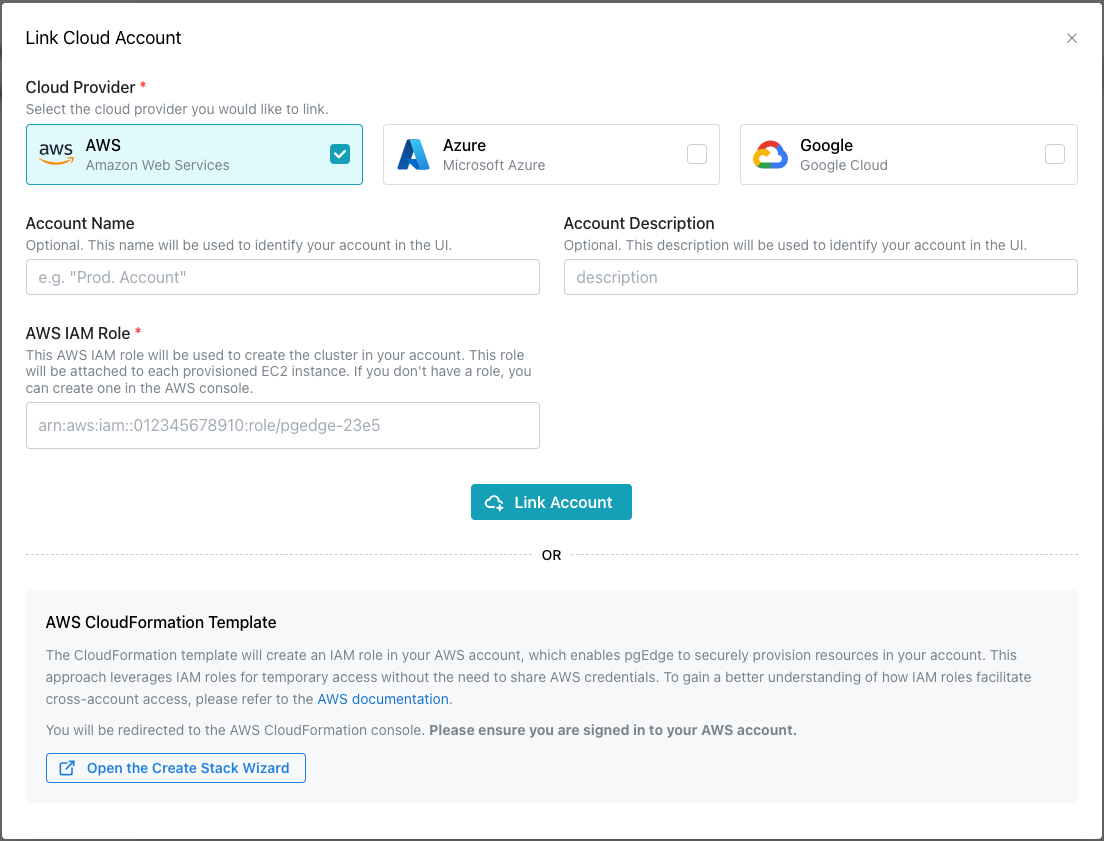
If you have an AWS IAM Role you wish to use, you can use the fields in the
top portion of the dialog to create the link:
- Provide a user-friendly name in the
Account Namefield. - Provide an account description in the
Account Descriptionfield. - Provide your AWS IAM role identifier in the
AWS IAM Rolefield.
When you're finished, press the Link Account button to link the account and
add it to the Cloud Accounts page.
Creating an AWS IAM Role for use with pgEdge Starfleet BYOC
The console provides an AWS CloudFormation Template to simplify creation of an IAM role. Template settings create a role that allows BYOC to securely provision resources in your account (using IAM cross-account trust policies to assume the role). This is the AWS-recommended approach.
Before using the wizard to create an IAM role, open a browser tab and log in to
your AWS account. Then, return to the console window and select the
Open the Create Stack Wizard button. When the AWS Quick create stack window
opens, the template is displayed, complete with the details you need to create
an IAM role for replication management.
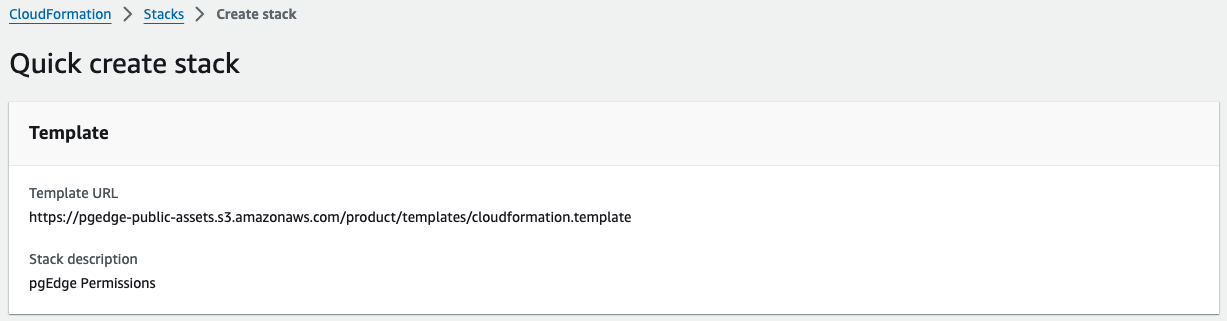
The URL of the BYOC AWS CloudFormation Template is:
https://pgedge-public-assets.s3.amazonaws.com/product/templates/cloudformation.template

CloudFormation prompts you to provide a name for the stack in the Stack name
field; you can accept the default and scroll down.
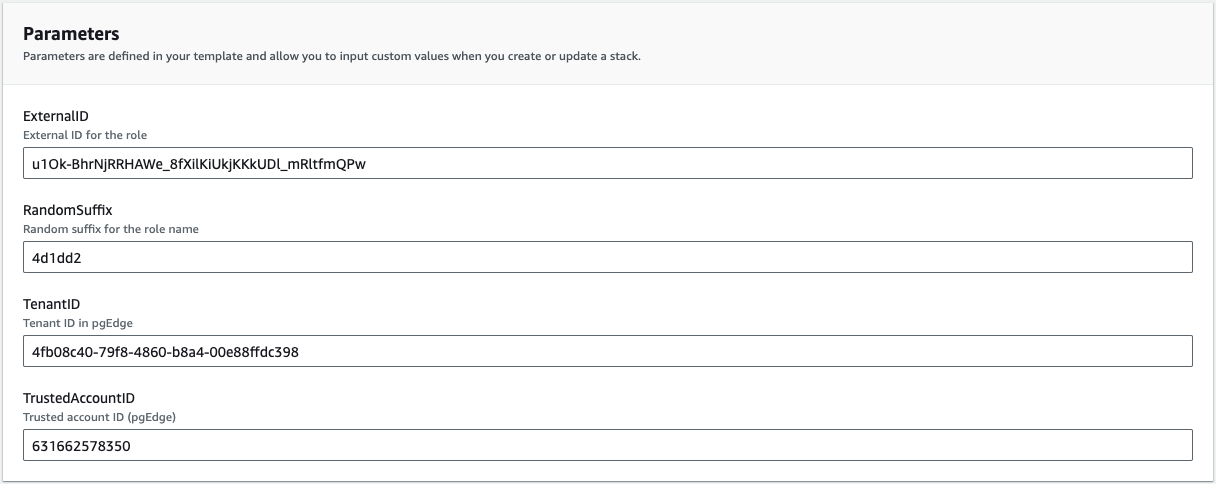
The CloudFormation Stack Parameters are completed as required, allowing BYOC
to securely provision resources with your AWS account.

No changes are required in the CloudFormation Stack Permissions section.
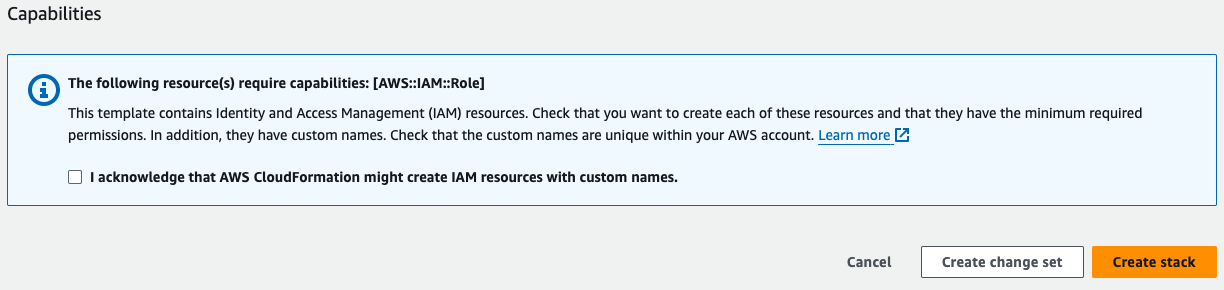
Review the message in the Capabilities section, and check the box next to
I acknowledge that AWS CloudFormation might create IAM resources with custom names.
Then, select Create stack.
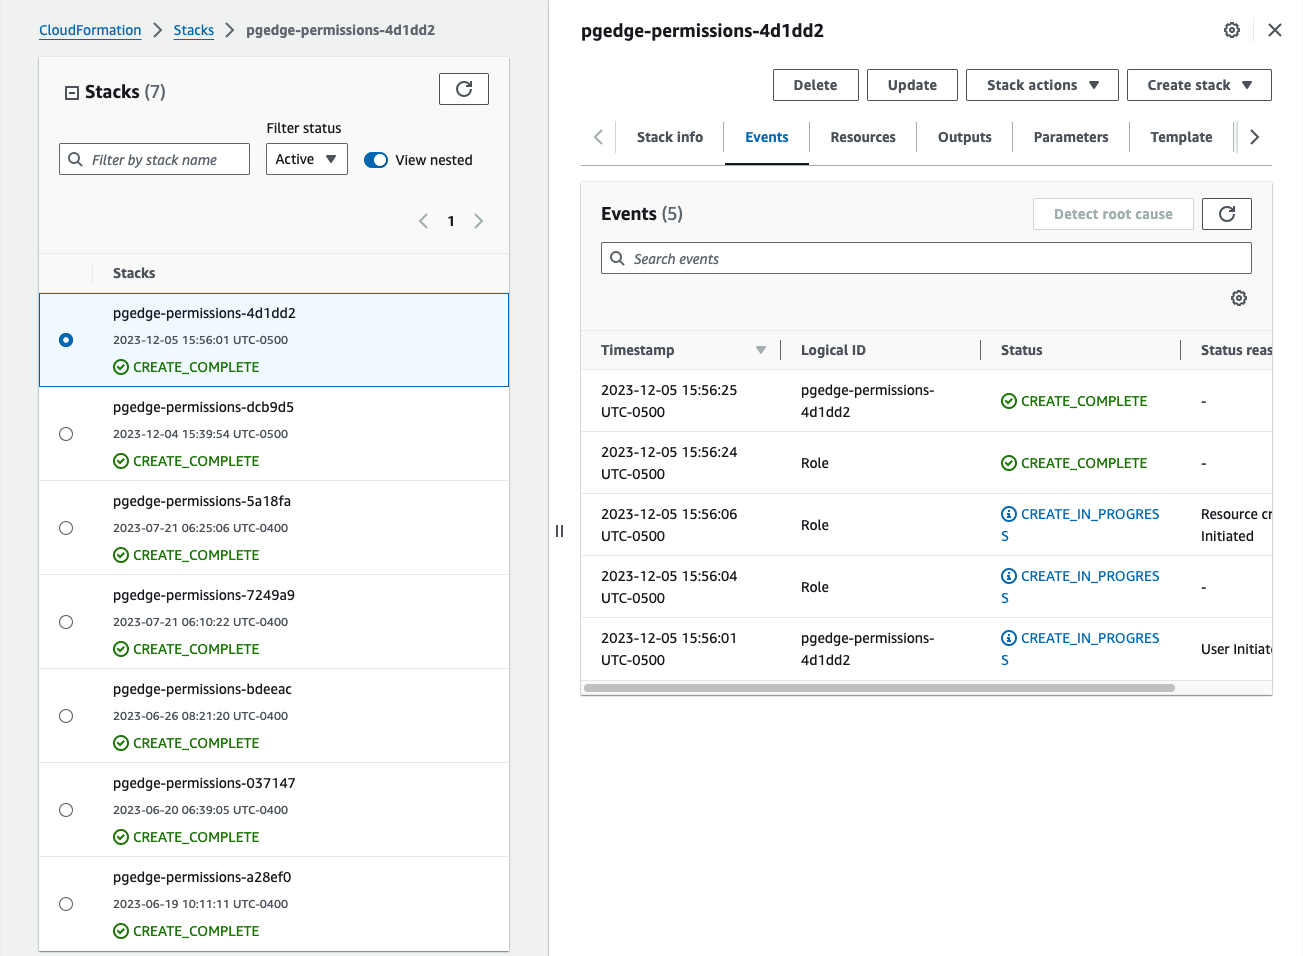
AWS CloudFormation navigates to a page listing the stack creations that are in
progress; when your stack completes, select the Resources tab in the right
pane.
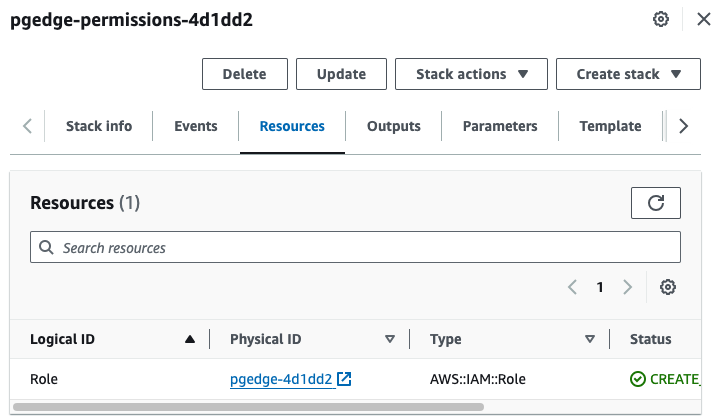
Select the link in the Physical ID column to open a details page in the AWS
Identity and Access Management (IAM) service console. The ARN is displayed in
the page Summary.
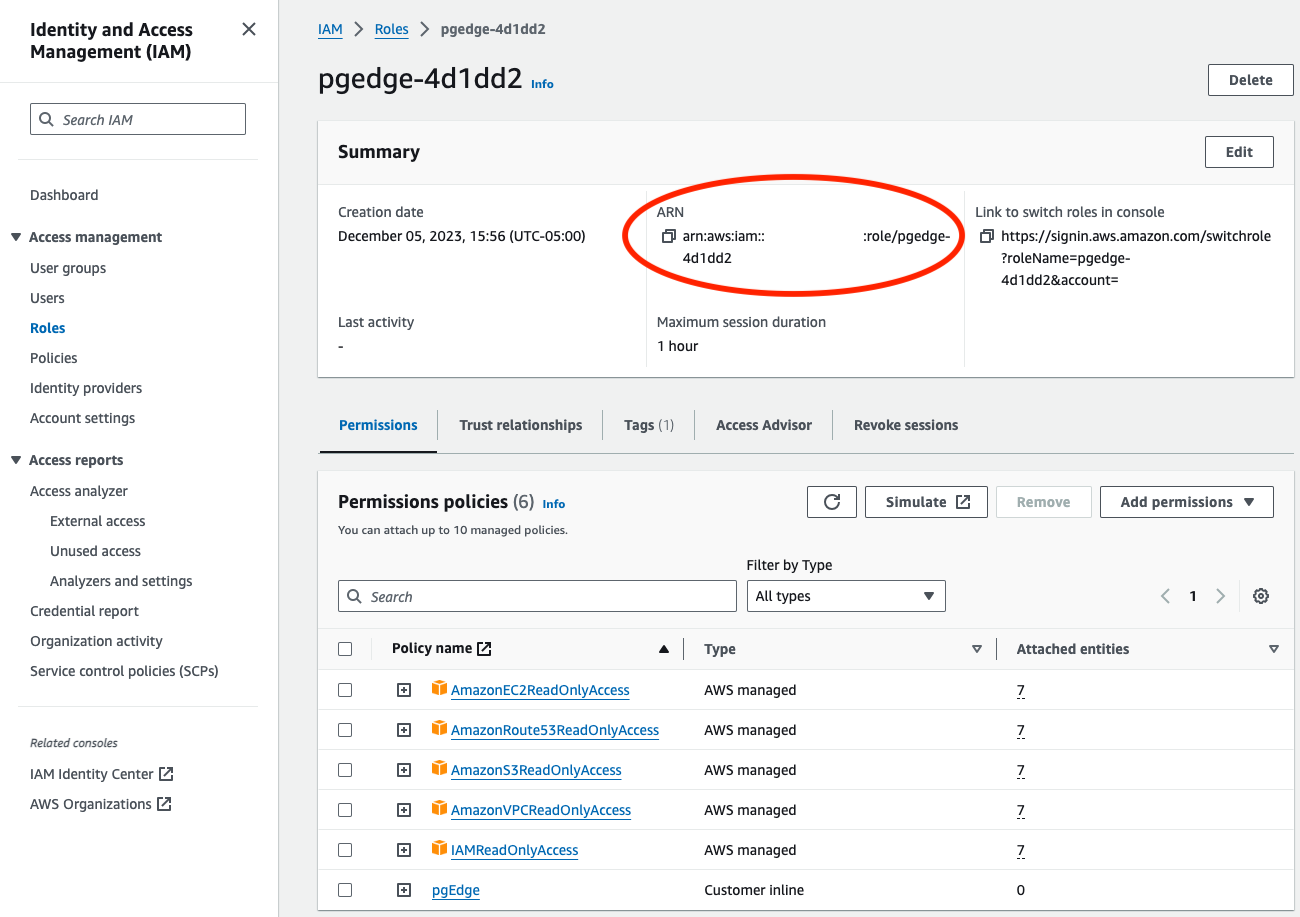
Copy the role ARN, and return to the console. Add the role ARN to the
AWS IAM Role field, specify a name for the account in the Account Name
field, and a description of the account in the Account Description field.
Select the Link Account button to finish linking your account.
With a linked account in place, you're ready to create an Enterprise Edition cluster.
Creating an AWS Key Pair
To create a new AWS key pair:
- Sign in to the AWS management console.
- Navigate to the EC2 service.
- Select
Key Pairsfrom theNetwork & Securitymenu. - Select the
Create key pairbutton located in the upper-right corner of theKey Pairswindow to specify the key pair details.
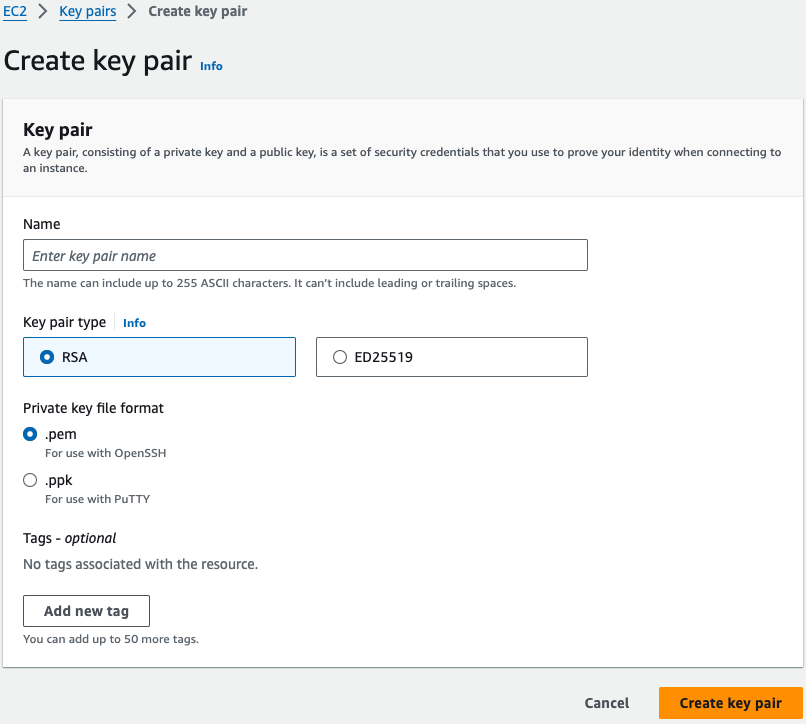
On the AWS Create key pair window, provide a name for the key pair in the
Name field; the other fields can be left to their defaults. Select
Create key pair to create the key pair and return to the main Key pairs
window.
You can now use the AWS key pair when defining a cluster that is provisioned on AWS.
Enabling a Region in the AWS Console
While you can access all regions in the BYOC console, not all regions may be enabled for use in your AWS account. To enable a region, log in to the AWS management console; then, use the arrow to the right of your user name (in the upper-right corner) to access the account information menu.
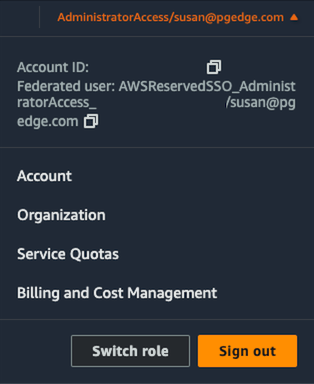
Select the Account menu option to navigate to the Account information page;
scroll down to the AWS Regions table.
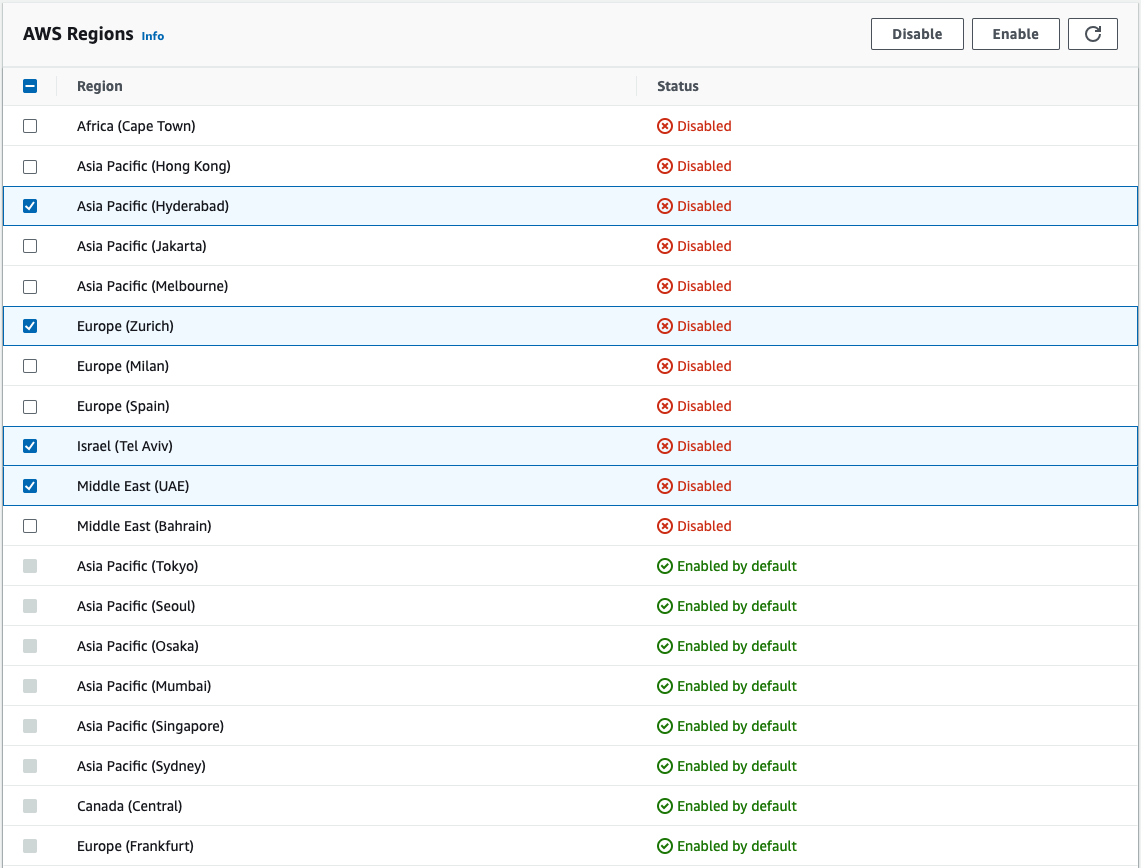
To enable a region for use with pgEdge Starfleet BYOC, check the box to the
left of the region name, and select the Enable button. A popup will open,
asking you to confirm that you wish to enable the region(s); select the
Enable regions button to continue. Use the refresh button in the
upper-right corner to update table to check the Status column.
Deleting an Account Link
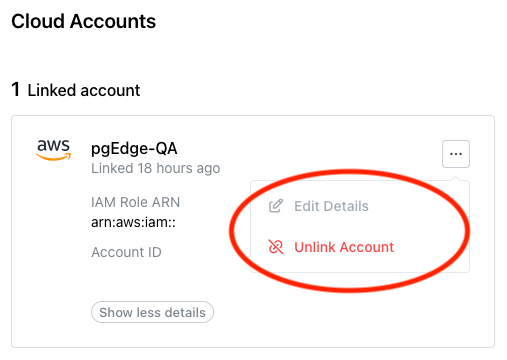
Before deleting an account link, ensure that any resources deployed with BYOC have been backed up to your satisfaction and destroyed. Then, to delete the link to a vendor account, select the menu icon (...) in the top-right corner of the pane of a linked account.
When the menu opens, select Unlink Account.
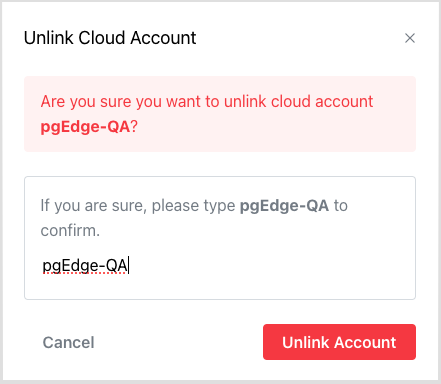
To confirm that you wish to unlink the account, enter the account name in the
Unlink Cloud Account popup, and press the Unlink Account button.