Accessing Management Options with the Actions Menu
The Actions drop-down, on the right-hand side of your database's management
page header, offers management options for your database:
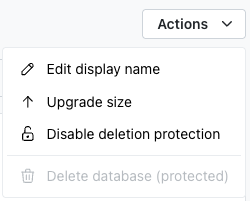
Edit display name: set an optional display name for your database.Upgrade size: change the size tier of your database.Enable deletion protection/Disable deletion protection: toggle deletion protection for your database.Delete database: delete your database. This option is unavailable (protected) while deletion protection is enabled.
Editing the Display Name
Select Edit display name from the Actions menu to open the
Edit display name popup.
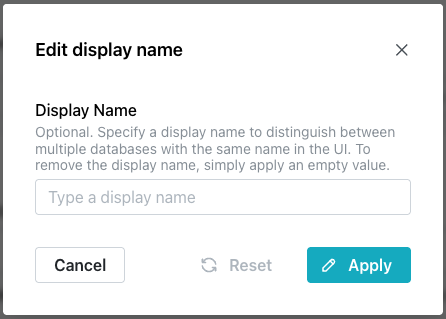
The Display Name is optional; use the display name to distinguish
between multiple databases that share the same database name in the
console UI, and it does not change the database's actual name (displayed
in the Database name field of the Connect pane). Enter a display name
and select Apply to set it, or select Reset to revert to the
last applied value. To remove a display name, apply an empty value;
select Cancel to close the popup without making changes.
Upgrading the Size Tier
Select Upgrade size from the Actions menu to change the size tier of your
database. The Upgrade size popup opens, showing your database's current
size and price, and the sizes you can upgrade to.
Upgrade size is disabled while the database has branches, because a
branch retains the size it was created with. Delete the database's branches
first, then upgrade the size. See
Understanding Branches.
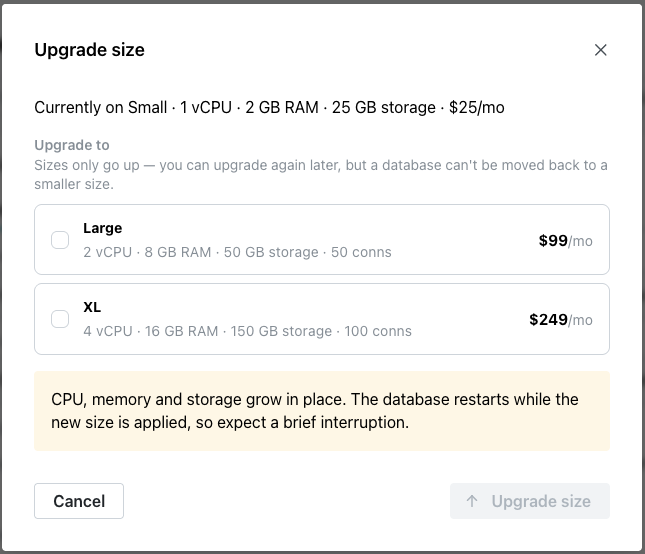
Select the size you want to upgrade to, then select Upgrade size to confirm,
or Cancel to close the popup without upgrading. Sizes only go up. You can
upgrade again later, but a database cannot be moved back to a smaller size.
CPU, memory, and storage grow in place; the database restarts while
the console applies the new size, so expect a brief interruption.
For what each size provides, see Managing Database Details.
Enabling and Disabling Deletion Protection
The Enable deletion protection option in the Actions drop-down works like a
toggle; select it once to enable protection, and a confirmation popup in the
lower-right corner of the window confirms that protection is enabled. To
disable deletion protection, select Disable deletion protection from the
menu.
While deletion protection is enabled, Delete database is
unavailable; disable deletion protection before deleting the
database.
Deleting the Database
Select Delete database from the Actions menu to permanently delete your
database. This option is unavailable while deletion protection is enabled; see
Enabling and Disabling Deletion Protection.
Troubleshooting
-
The console displays
Could not resize the database.when it refuses a resize.A resize requires the database to be in an
availableordegradedstate. You can only resize to a larger size. -
The console displays
Could not delete the database.when it refuses a delete.Deletion protection is the common cause; the menu item reads
Delete database (protected)until you disable it. The other cause is an unfinished billing provision, on a database created moments ago or one still resizing. Wait and try again. -
The console displays
Could not update the database.when it refuses a display-name edit.A display name change does not lock the database and succeeds even on a busy database, so database status does not explain a refusal here. Check the name length against the field's limit.
-
The console displays
Could not update deletion protection.when it refuses the switch.This action also does not lock the database, so retrying is reasonable. The switch stays changeable on a
Faileddatabase, because a protected failure must be removable.